
If you would like to create a board, here is what you need:
If you are a member of several teams, first choose a team on the left side of the Dashboard where your created board will be saved. Further, you can move the board into another account if it is necessary.

- Click on the +New board button:

The blue button to create a new board is always the first one on your dashboard
To jump-start your work, upon entering your board for the first time we will suggest using one of the templates from our library. You can skip it if you wish - you will always be able to use templates later.
Access to your board:
If you choose a team and then choose a certain project within the working space - the board will automatically belong to that very project and will be shared with the project's participants - they can be seen beside the project's name:

The dashboard shows to which project your board will belong and to which team the project belongs
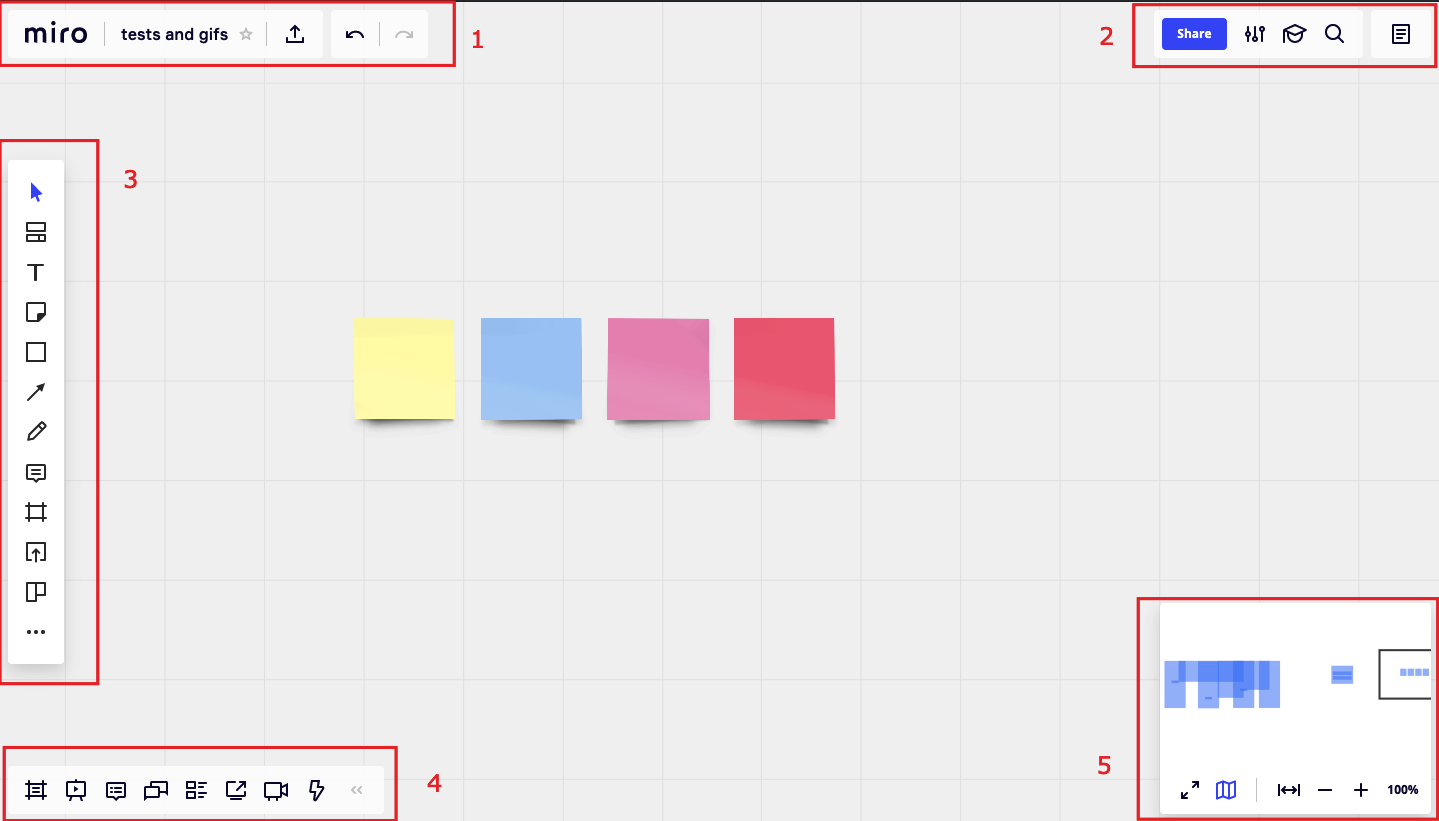
The board interface
In the centre of the board window, there is the working space - the board itself. Here you add and organize content, insert templates or links to other sites, platforms and services.
The board interface
The working space is surrounded by a few sets of tools and settings:
1. The main board menu:
| Miro button to go back to the dashboard | |
| Board information card | |
| Export options | |
| Buttons undo and redo |
2. The settings toolbar:
| Sharing settings | |
| Board settings | |
| Learn & Inspire center (tutorials, use cases, FAQs, form to contact support, etc) | |
| Search |
3. The main Toolbar and applications that are available for users.
4. The bottom toolbar:
5. The navigation toolbar:
| Full-screen mode | |
 | Map |
| Fit to screen mode | |
| Zooming in and out | |
| | Current scaling |
Board information card
In order to identify your boards, we recommend you to
- Create a unique title for it,
- Set a cover picture;
- Add a description;
- Add the board to a corresponding project;
- Mark the boards that you refer to most frequently with a ★star.
You can set all of this in the board information card:
Note that the Select preview area option is not supported in Safari
Here you can also check the board owner, the date of creation and of last changes and also the project it is saved in. In this menu, you can delete and duplicate the board if you have the ownership rights.
💡 Although Miro boards are endless, it is more convenient to devote each board to one particular topic or project.
When you're creating a new board do not activate the 2 features below.
If you do that, everyone using Miro(RTB) will receive a notification by email when you use the board.

 The best way to get IT support is to use the new
Service One Platform.
The best way to get IT support is to use the new
Service One Platform.